CiuisCRM: Calendar

Last update: Tuesday, Sep 20, 2022
Calendar
1. You can find the "Calendar" menu by hovering over "Others" from the top header:

2. Added events to CRM are displayed as shown below.

Create Events:
1. To create an event click on the "+" icon from the right panel of the screen under "Events Tab"

A right slider appears. Enter the details
1. Event title : Enter event name.
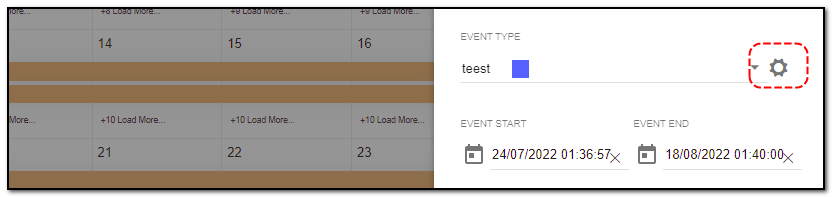
2. Event Type : Select the event type form the drop-down.
3. Event start & event end time : set event start and end date and time.
4. Assign: select the staff form the drop-down you want to assign the event to.
5. Event notes : Enter the event notes to remember event created.
6.Notification toggle : To get the event notification enable it.

1. Notification type : by email or by remainder.
2. Duration: you can set number of days
3. Time : set the time period whether months, days, weeks or year.
4. After filling in all the events details click on "Add Event" button at the bottom.

Create Event Type :
1. While creating the event, click on the "Create Event Type" settings icon.
A event type tabs open .
1. Create : click on create button .
2. Event type title : Enter the event title.
3. Event color : Enter event color of your choice.
5. Public check box :Check if the event is public to keep
6. Click on "Add event type".

Event type is created , and you can use it while creating an event by selecting the event type from the drop-down.


Misc Functions
Written by Yaroslav M.