CiuisCRM: Payrolls

Last update: Tuesday, Sep 20, 2022
Payroll
1. You can find the "Payroll" Main menu.
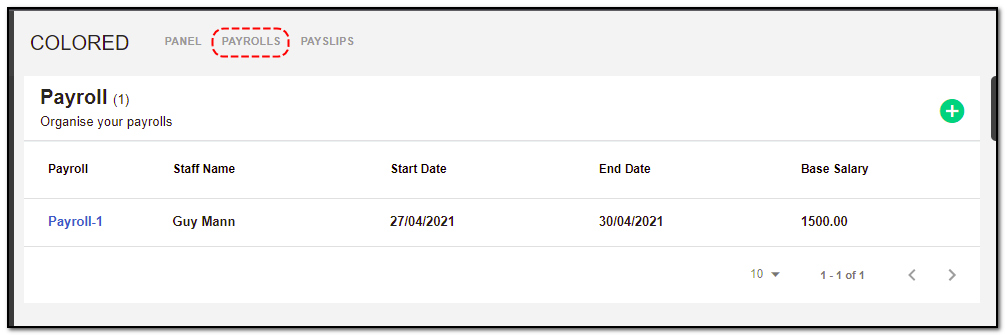
2. Added Payrolls will be listed on the payroll index page as shown below :
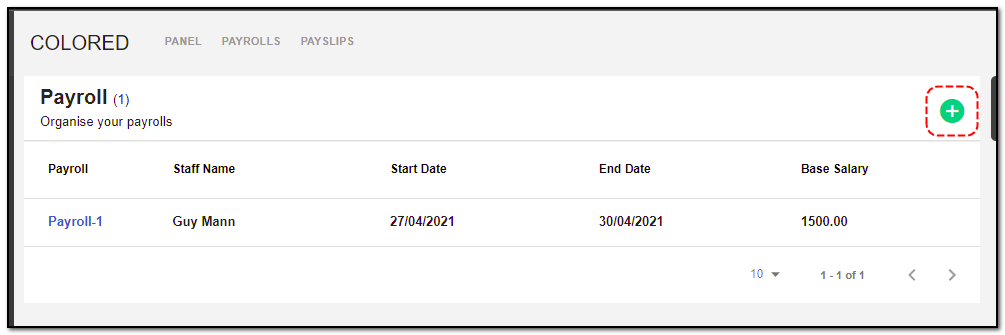
Create a Payroll:
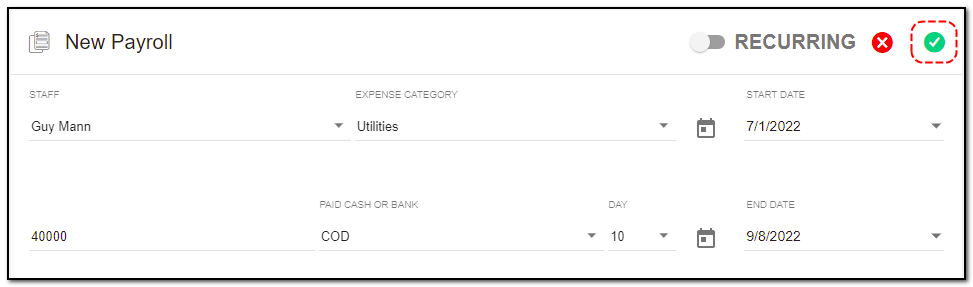
1. To create a payroll click on "+" from the payroll header.
2. A create payroll page opens: Enter the details :
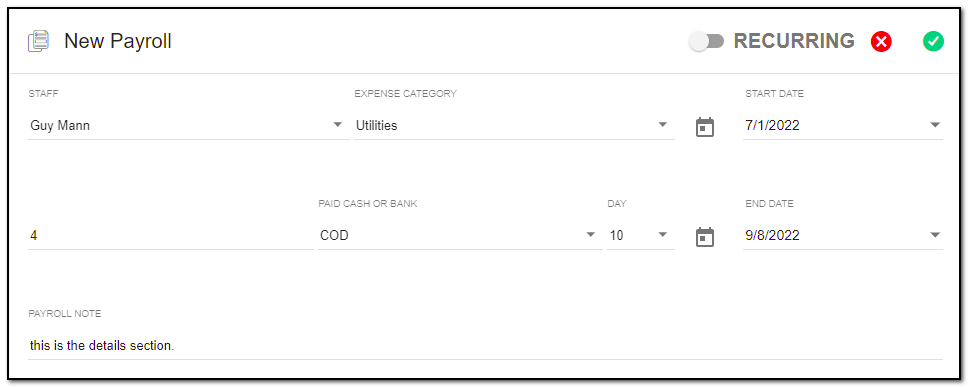
1. Staff: The staff for whom the payroll is to be created.
2. Expense Category: The expense category to be chosen when payment for the payslip is made.
3. Start Date: When the employee started working for your company.
4. End Date: The last date the employee will work for your company. Can be left blank if the end date is not determined. End date should be greater than the start date.
5. Base Salary: The basic salary to be paid to the staff per month.
6. Account: The account from which the salary payment must be deducted.
7. Day of Month: The day of the month on which the payslip must be generated from the payroll.
8. Payroll Note: Any additional information about this payroll. Will be visible on the payslip generated.
Allowance & Deduction :
1. Along with adding the payroll, you can add the allowance & deduction :
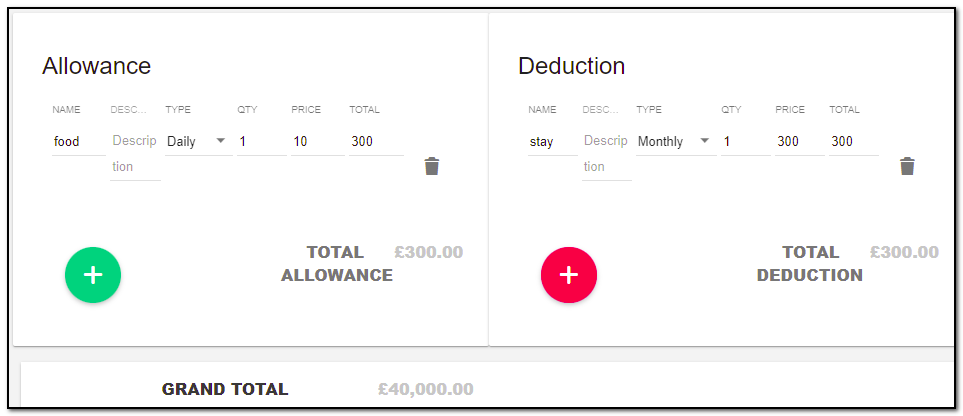
1. Allowance: Any additional allowances to be given to the employee. This will be added to the base salary.
2. Deduction: Any deduction to be made from the salary. This will be deducted from the base salary.
3. Name: Name of allowance/deduction.
4. Description: Additional description for the allowance/deduction.
Type: Has 2 types, Monthly and Daily.
Monthly: When the allowance/deduction should be given once per month.
Daily: When the allowance/deduction should be given every day for the month. Will multiply the item total by 30.
5 . Qty: The number of people to which the allowance/deduction should apply. Ex: 1 if only the employee gets the allowance, 2 if the employee and 1 dependent gets the allowance.
6. Price: The allowance/deduction amount. Once you have filled in all the details for payroll click on "Save" button .
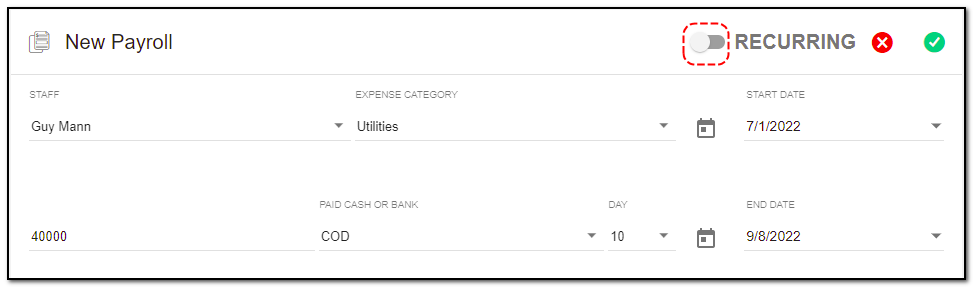
Create payroll Recurring :
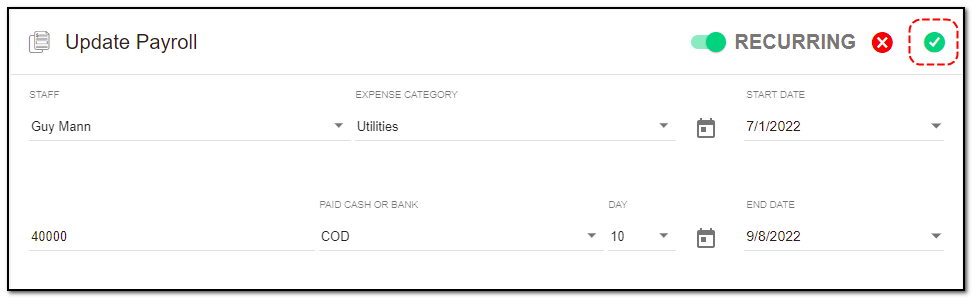
1. Recurring : To create recurring payroll follow the same step as you did for creating a payroll. To mark the payroll as recurring toggle on "Recurring" on the top ,three new fields will be introduced . Enter the details.
2. Set the required recurring period. A payroll will be created when you click on the “Save” button. Every time you run the CronJob, it will check if the recurring period has elapsed after the issue date, if it has elapsed, then another payroll is created and added to the email list.
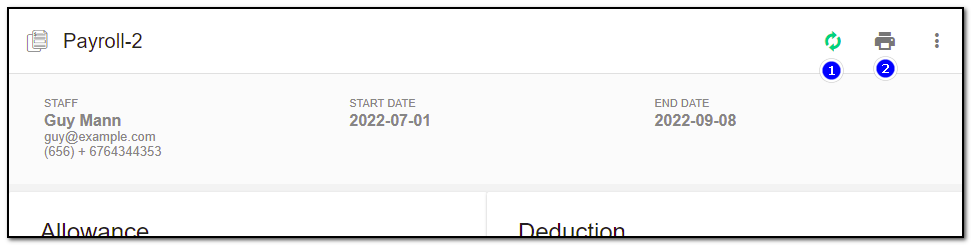
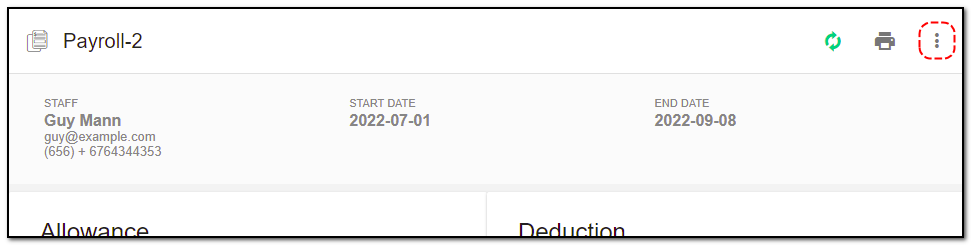
Payroll View Page :
1. On the view page of payroll you can see all the details you added while creating a payroll. You can also see some action button on the payroll headers.
Converting payroll :
Once you click on the convert button, your payroll is converted into payslip.
1. A Payslip can only be generated for the previous month.
2. To generate payslip from a payroll, click on the Convert button in the toolbar.
3. A payslip for the previous month is generated if Run Day has passed for the current month.
4. If the Start Date is less than the 1st of the previous month, the generated payslip will take into account the appropriate number of days and calculate the Base Salary, Allowance Total and Deduction Total accordingly. (If the current date is 6 Feb, and the Start Date is 15 Jan, the payslip will be generated for 15 Jan to 31 Jan)
5. Print: You can print the payroll or download it into a pdf.
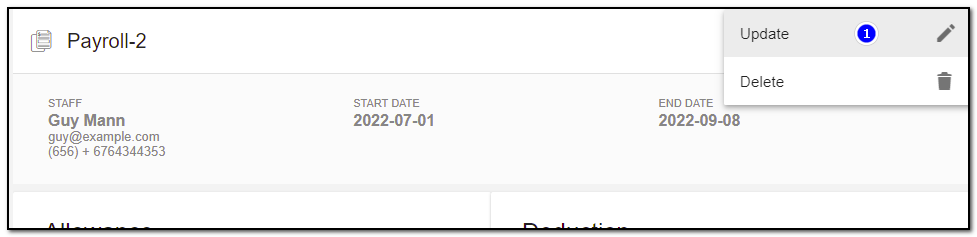
6. More options : this option consists of "Update" & "Delete" Payroll.
Update Payroll :
1. To update the payroll details click on "More" option from the header.
2. Click on "Update" button .
1. A update page opens . Update the details of the payroll, like: adding new allowance or deduction or updating the base salary . Click on "Save" button.
Payroll Delete :
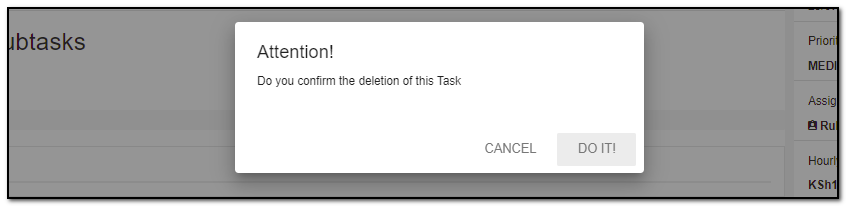
1. To delete the payroll click on "Delete" button.
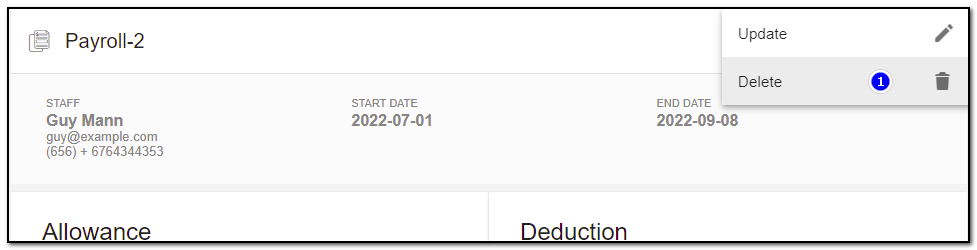
2. A small pop up appears to confirm the deletion of task . Click on "Do it" if you want to delete else click on "cancel" .


Modules
Written by Yaroslav M.