CiuisCRM: Projects

Last update: Tuesday, Sep 20, 2022
Projects
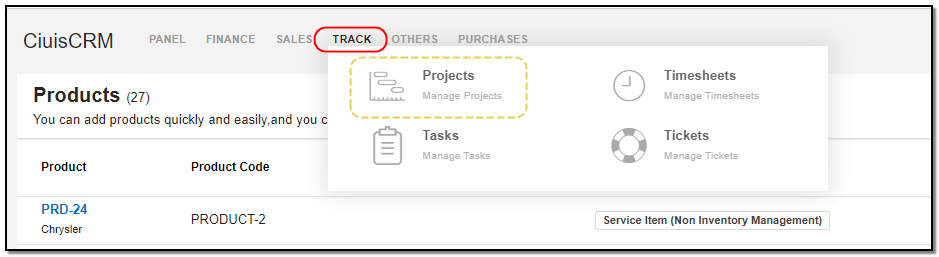
1. You can find the "Projects" menu by hovering over "Track" from the top header:
2. Added projects to CRM are displayed as shown below , On the header of projects you have some action buttons.

1. Search : This will help you search for a project based on "Project name , Project Value".
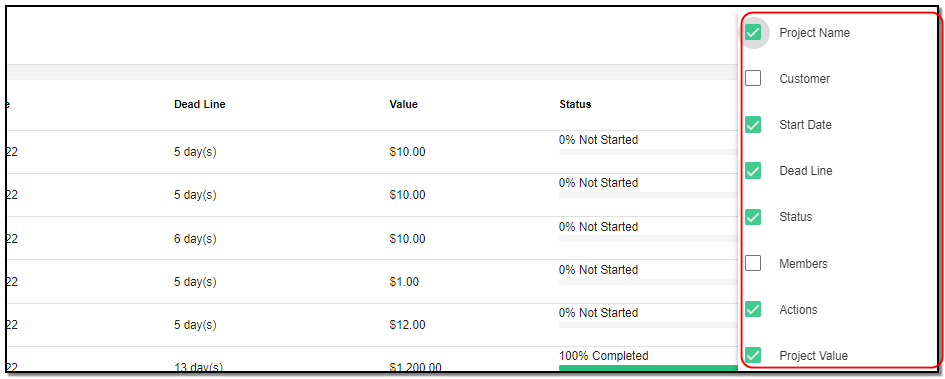
2. Filter by Column : By default, all the columns for the project table are displayed. To manage what column needs to be displayed, click on the "Filter Column" icon . After you click on the icon, a box will appear as shown in the image below . You can "Check" or "Uncheck" the fields you want to display on your project page.
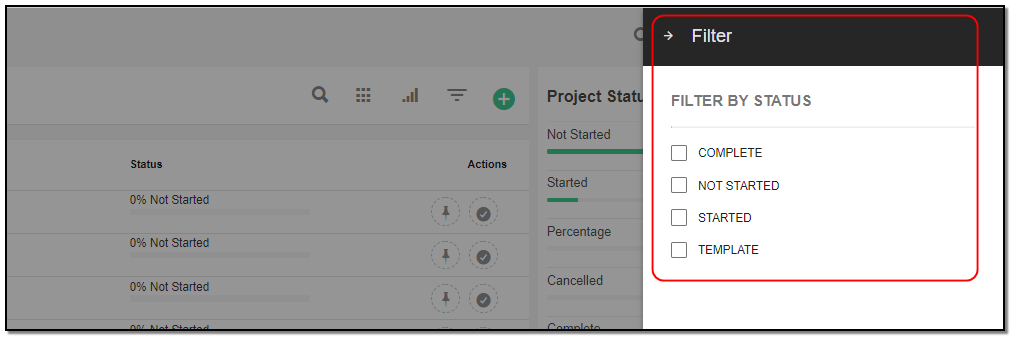
3. Filter: To filter the purchase by Status or by Status .Click on the "Filter" icon.
Create Project:
1. To create a project click on the "+" icon from the project header section.

A Right slider opens Enter the
1. Name: Name of the project.
2. Choose Customer: Select the customer from the drop-down.
3. Start date : Enter the project start date.
4. End date : End date of project
5. Project Value : Enter the project value.(Cost of the value).
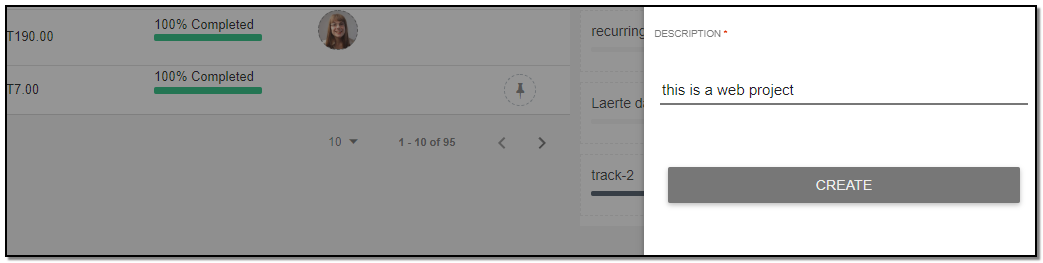
6. Description : Enter description of the project. After filling in all the details , click on "Create" on the top right. Your project will be created.
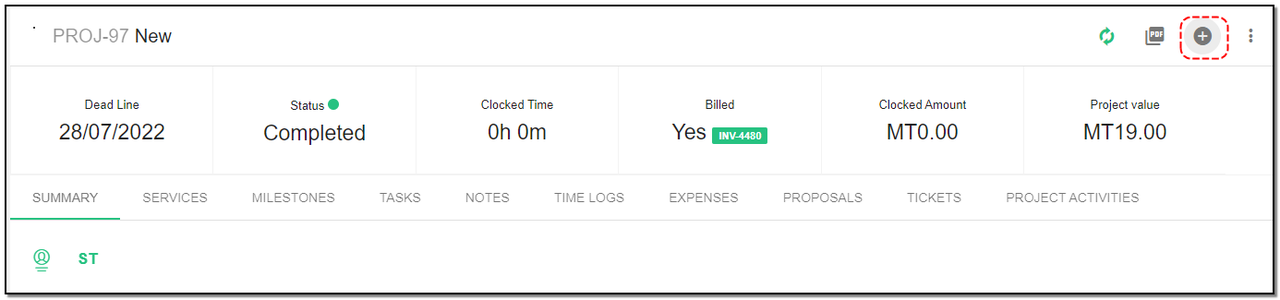
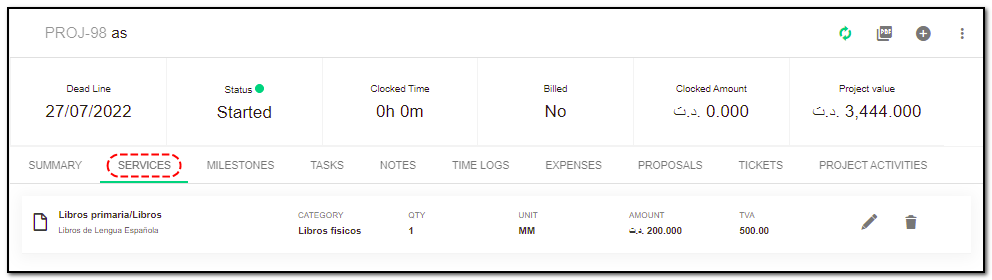
Project Overview :
On the project view page you can see the details and also some actions buttons
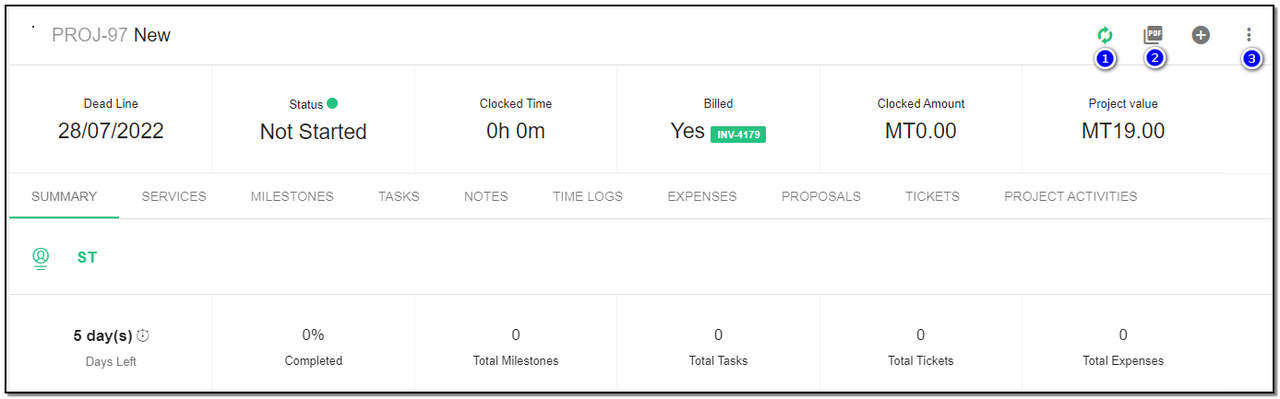
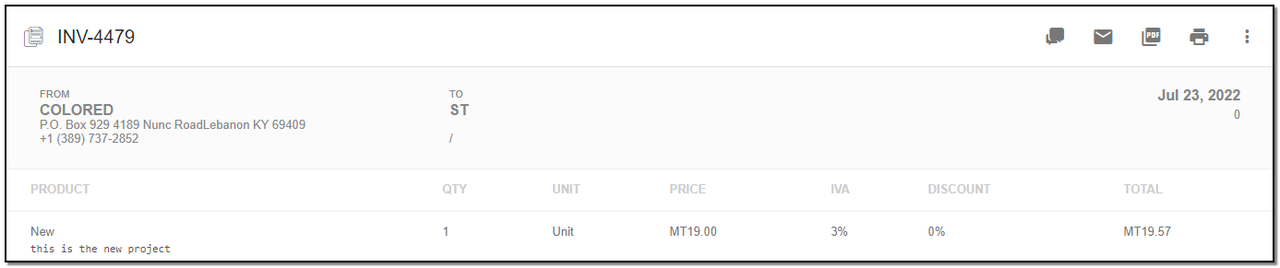
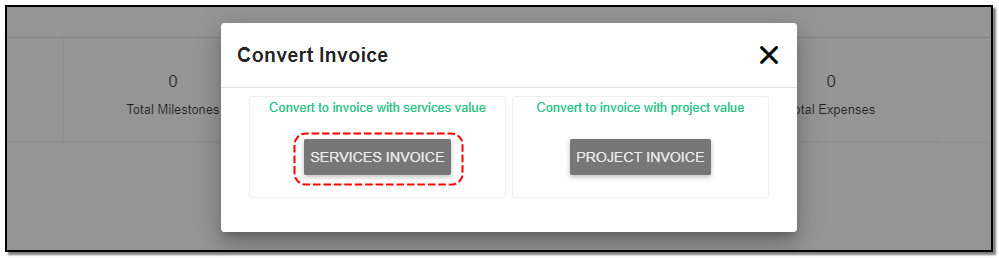
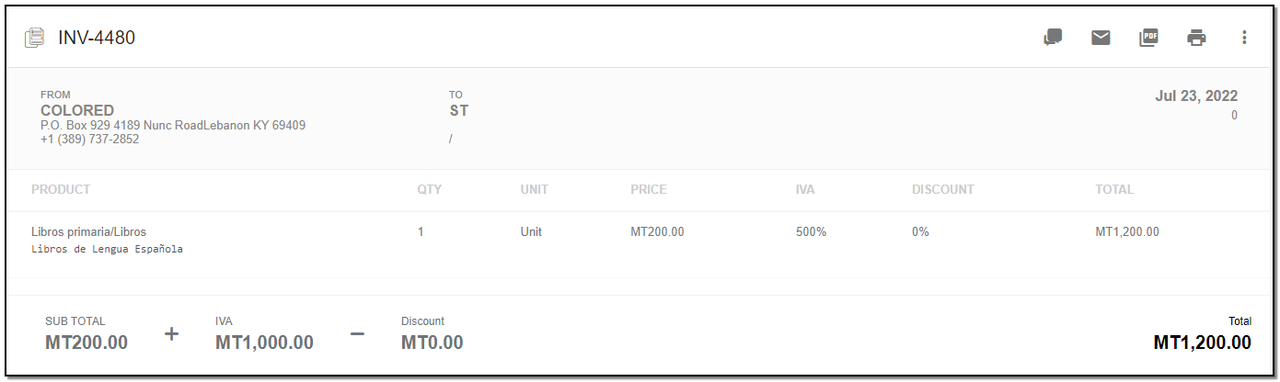
1. Convert : You can convert the project by " Convert to invoice with project value " or by " Convert to invoice with services value " .
2. PDF : By clicking on PDF option, you can create a PDF of the project and select what you need to add in the project pdf.
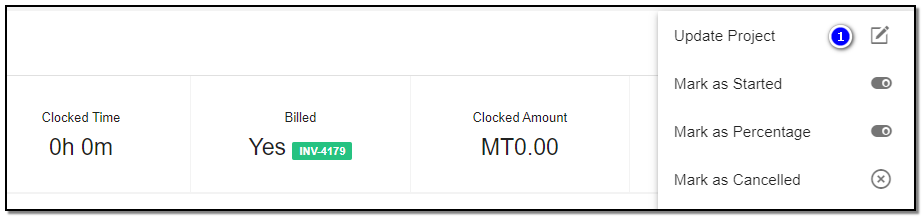
3. More options : These options consist Update , Delete , Mark project as started , Mark project as completed , Mark project as percentage and Mark as cancelled.
Update project:
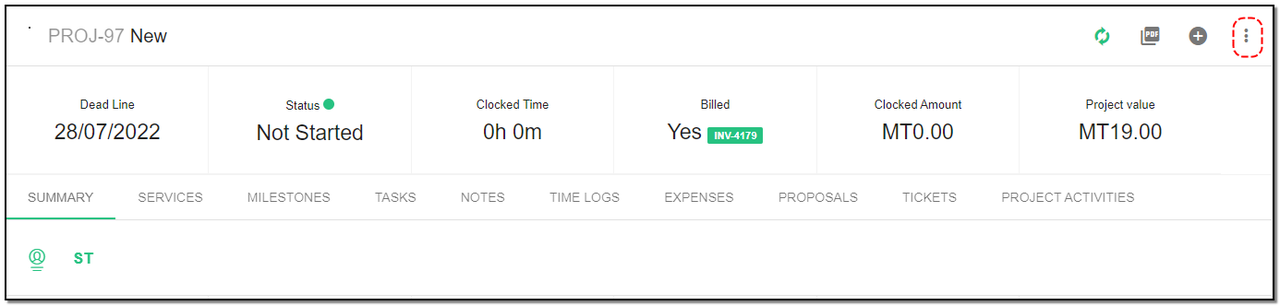
1. To update the project details click on "More" option from the header.
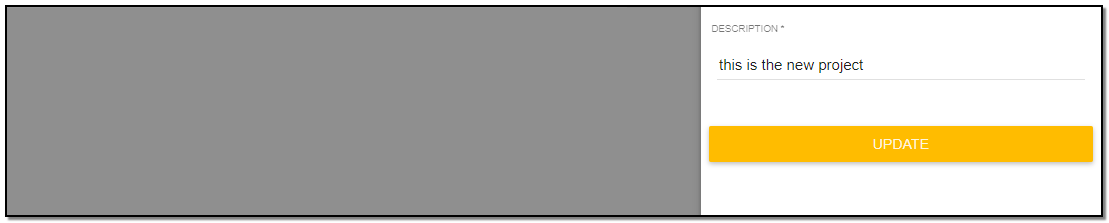
2. Click on "Update" button .
3. A right slider update page opens , Update the details of the project, like project value or description. Click on "Update" button.
Project Delete :
1. To delete the project click on "Delete" button from the header .
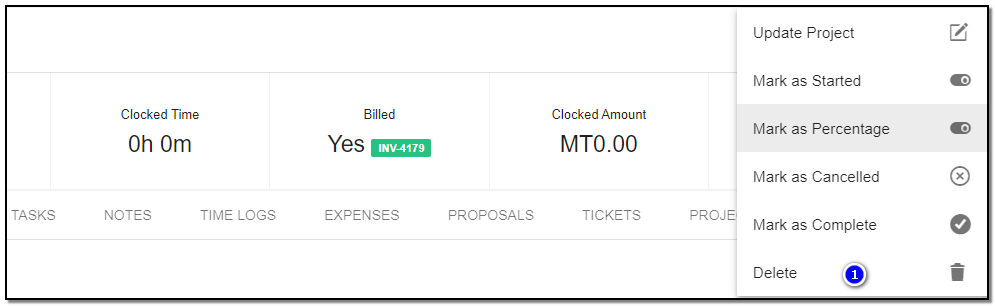
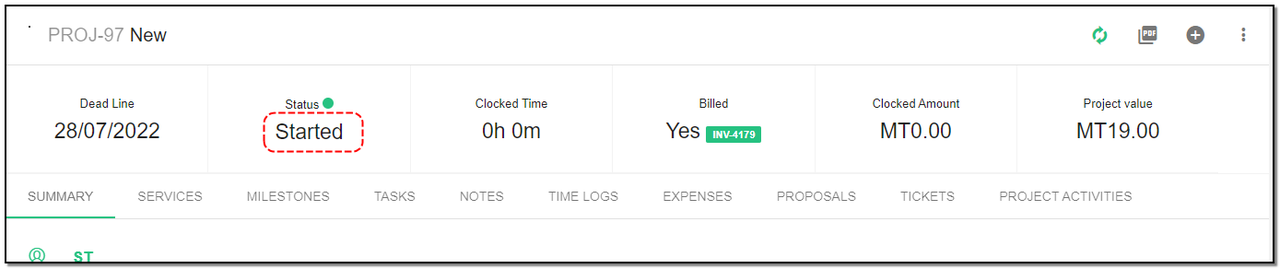
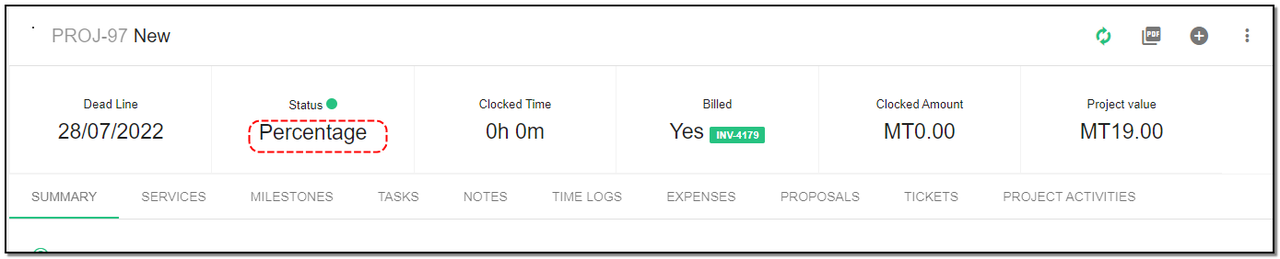
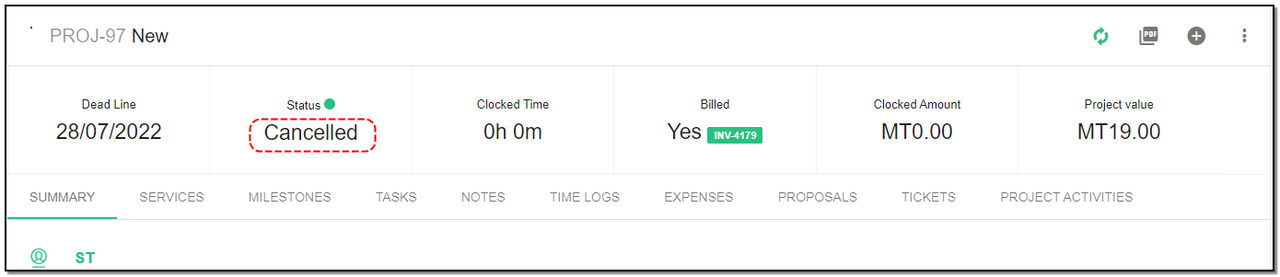
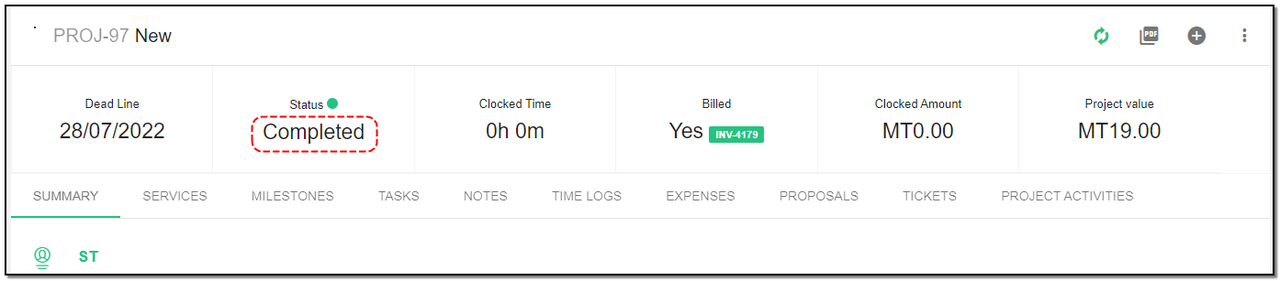
Project Status :
1. You can change the status of the project :
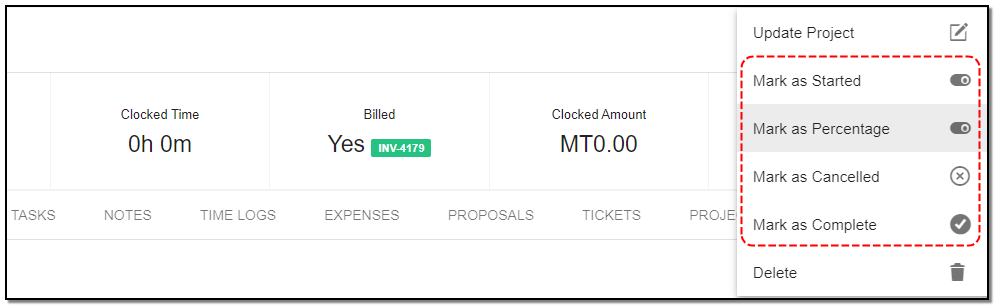
2. Mark as Started : The project is started. Once you click you can see the project is marked to started .
3. Mark as Percentage : You can track the progress of project by percentage. Once you click you can see the project is marked to percentage .
4. Mark as Cancelled : You can mark the project as cancelled.
5. Mark as Completed : you can mark the project as completed if the project is completed.
Converting project
1. If you convert "Project to invoice" you will get 2 options :
1.1 Convert to invoice with project value : you can convert the project into invoice which consists only project value .
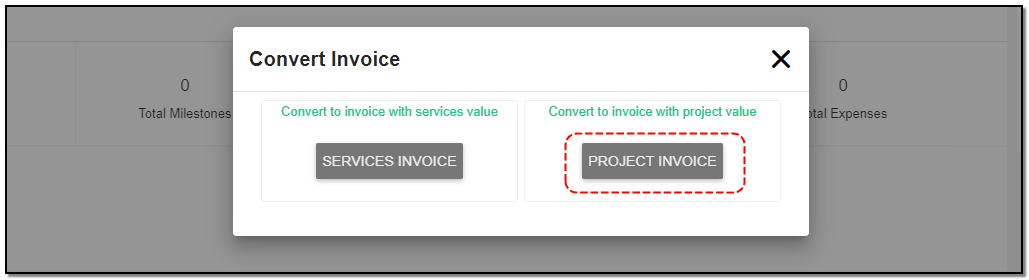
1.2 Convert to invoice with service value : you can convert the project into invoice which consists of the Product/service value if any service value your project holds .
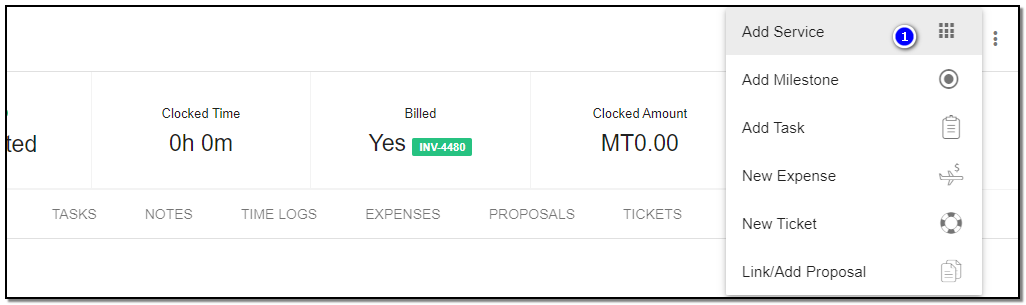
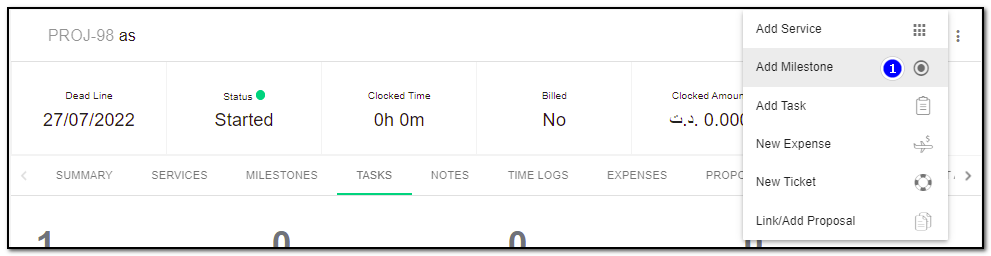
Add More Options to project :
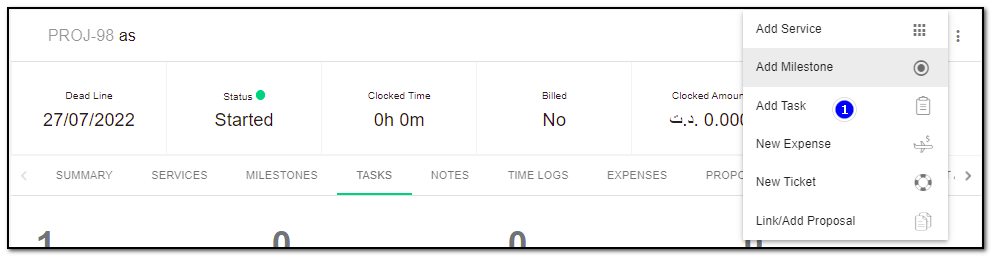
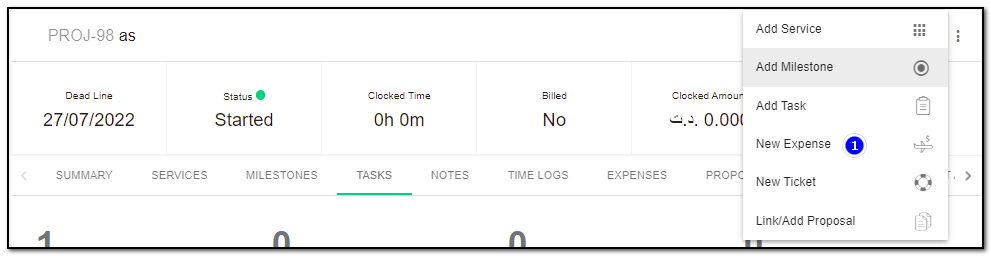
1. On the project view page you have more options for projects , where you can add different options to the project, like adding services for project , milestones, expenses and proposals.
2. Add service: You can add a service/ product to your project as follows:
3. To add the service click on "Add Service" . The right slider appears .
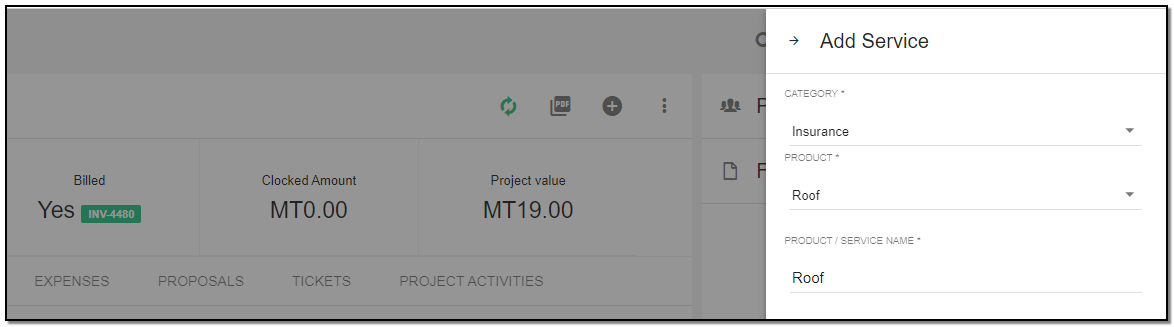
Enter the details like:
1. Category : you can select the category of the product from the drop-down.
2. Product : select the product for category you choose above. Otherwise, you can create the product by clicking on "+" button. The fields are auto-filled. Then Click on "Add" .
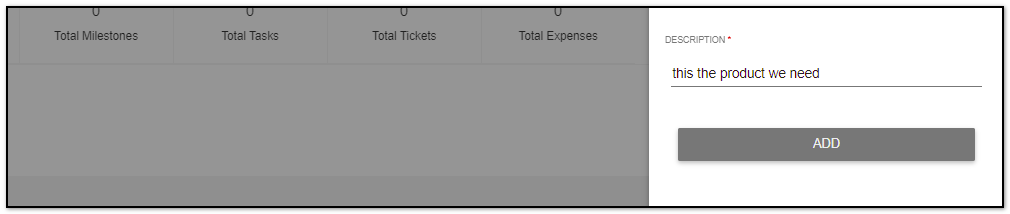
3. Your service for the project is created, You can check the service details under "Service tab"
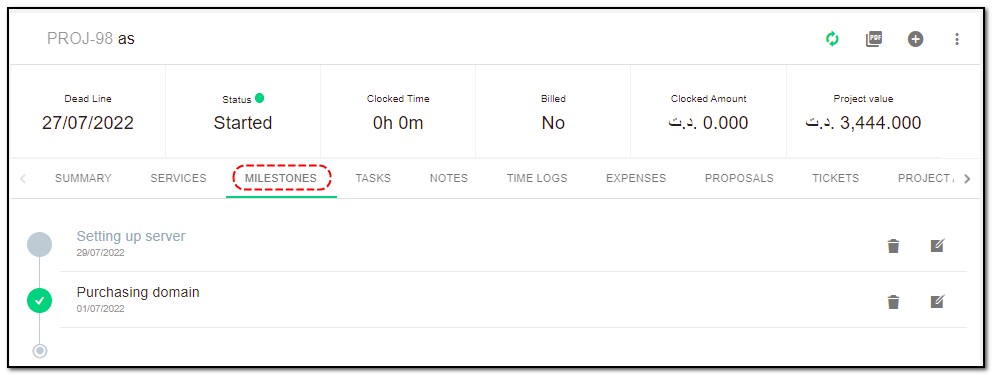
4. Add Milestone : You can add a milestone to your project as follows: To add the milestone click on "Add Milestone" .
5. The right slider appears .
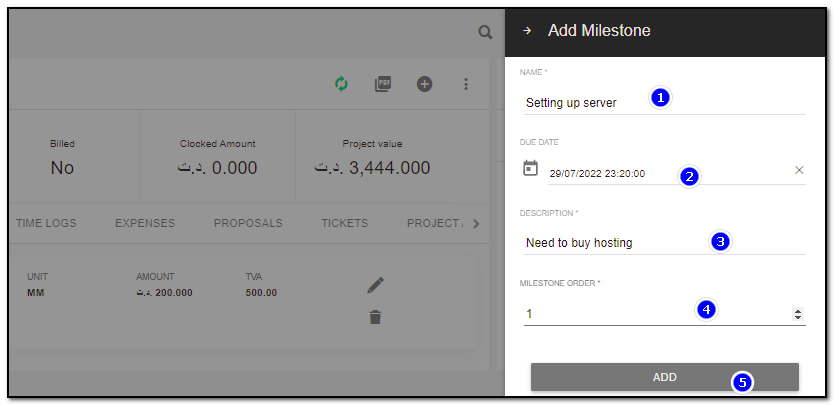
1. Name: Enter the Name of the Milestone.
2. Due Date : set the due date of the milestone.
3. Desc : The details or short description .
4. Milestone order : Enter which order of the milestone.
5. Add : Click on "Add" Your Milestone is added , to see the details click on "Milestone tab".
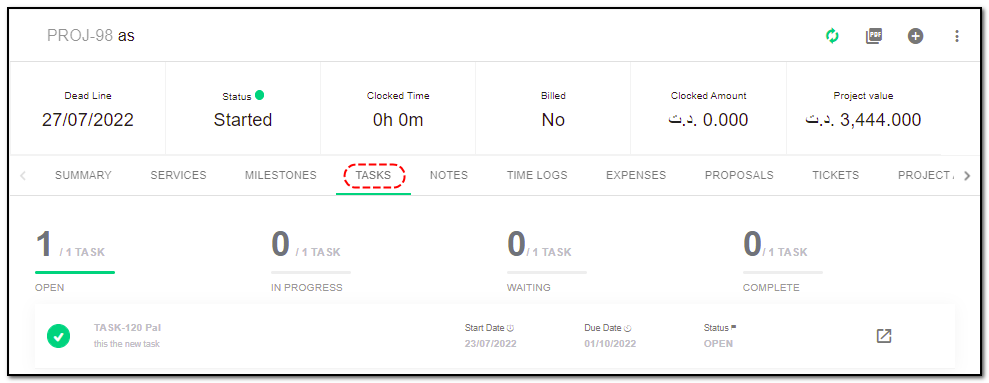
6. Add Task : You can add a task by clicking the "Add task" option. To add a "Task" to project click on "Add Task".
The right slider appears :
1. Name : Name of the task.
2. Hour rate : enter the amount for working per hour.
3. Start date : start date of the project
4. End date: end date of the project
5. Assigned : select from the drop-down which staff will handle this task.
6. Priority: the task priority whether high, medium, or low.
7. Milestone: select the milestone if any created from the drop-down.
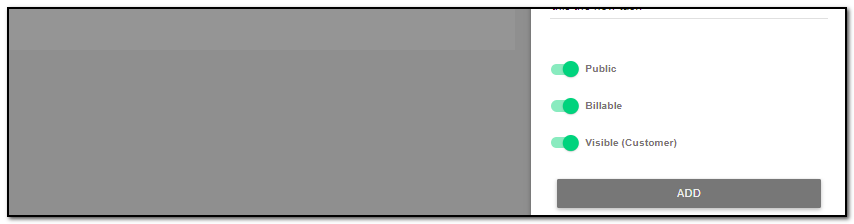
8. You can create a task public or private, billable or non-billable, visible or not using the toggle bars.
9. Click on "Add" and the task will be added. You can see the task details present under "Task tab"
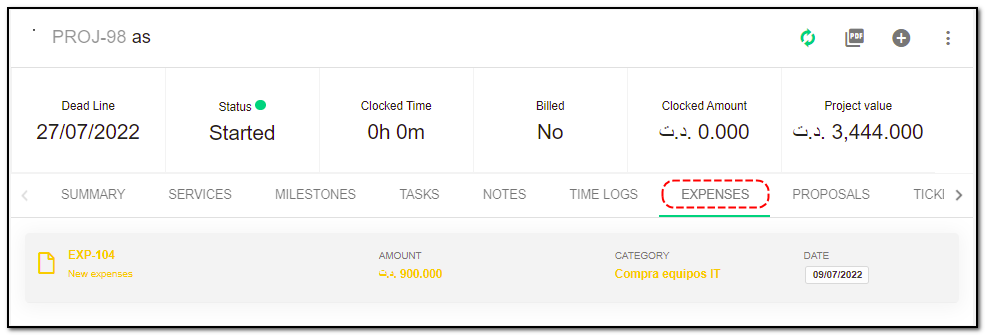
7. Add Expenses : You can also add a "New Expense" to your project to track any new expense that comes up in the project while fulfilling your customer’s needs. To add "Expenses" to project , click on "Add Expense".
1. The right slider appears, Enter the details like Name of the expense, amount, account and expense category from the drop-down.
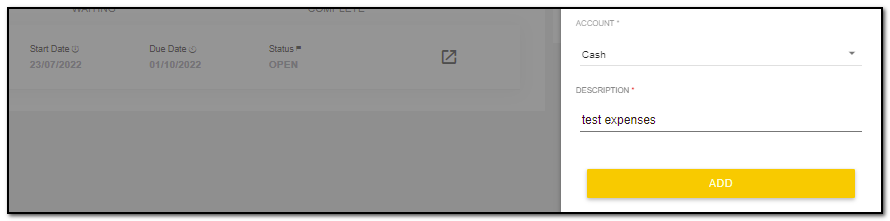
2. Then click on "Add" and your expenses will be added. You can see the expenses details present under "Expense tab".
8. Add Tickets : You can add a ticket by clicking the "Add ticket" option.
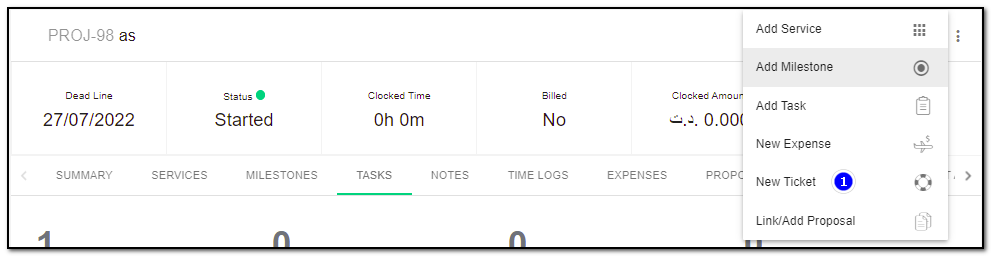
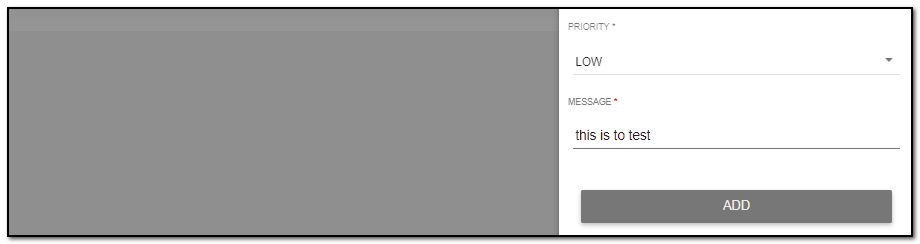
The right slider screen appears : Enter the Details for the ticket like :
1. Name of the ticket, select the department , priority and contacts from the drop-down.
2. Click on "Add" .Your ticket is added under project .
3. You can see the details of the ticket under "Ticket" tab .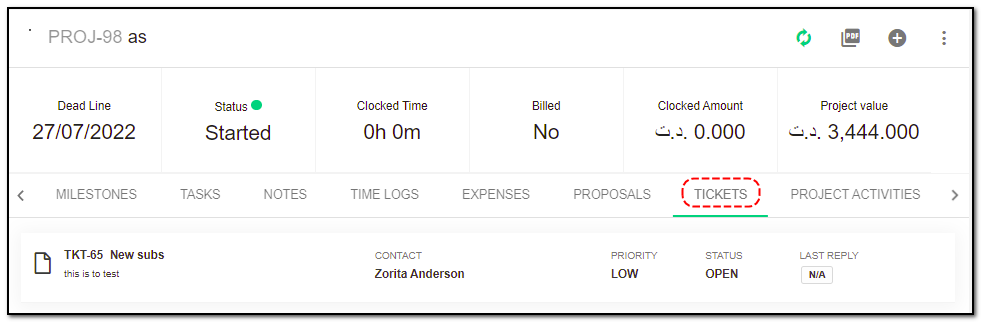
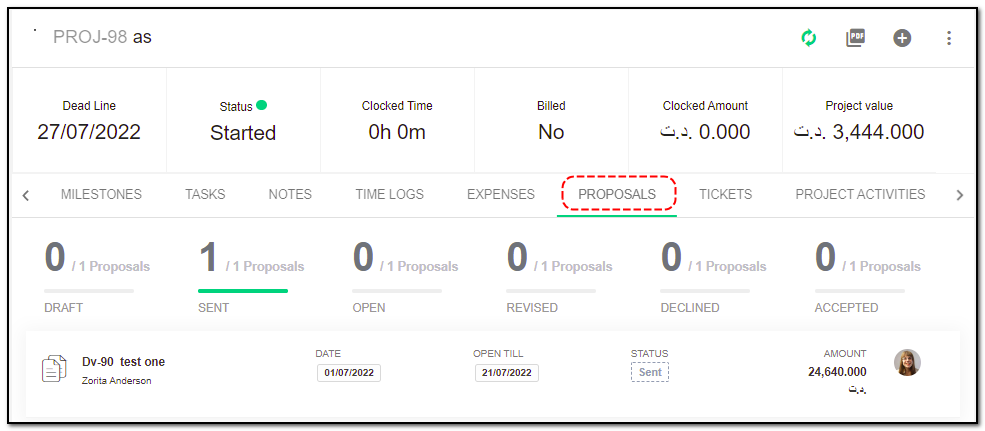
9. Add/Link Proposals: You can add/link the proposal by clicking the "Link/Add proposal" option.
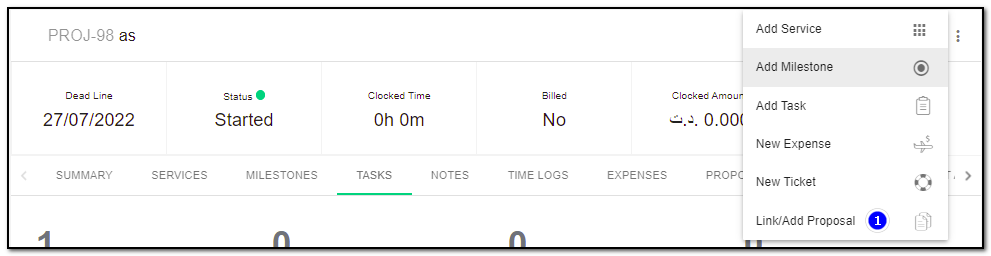
1. To add the existing proposal, choose the proposal and click on "Link" button. To create the new proposal enable the toggle to "New Proposal" button.
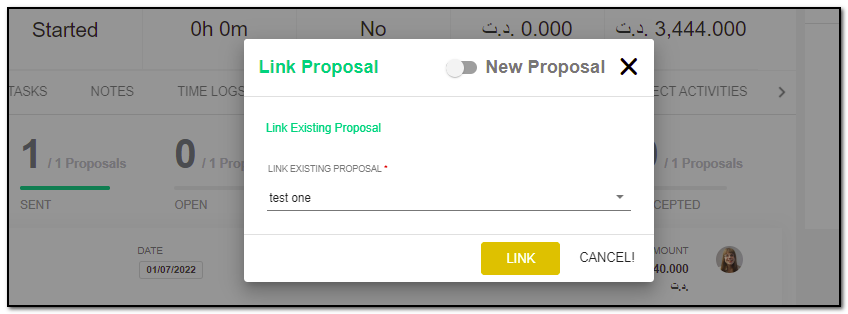
2. You can see the details of your proposal under "Proposal tab".
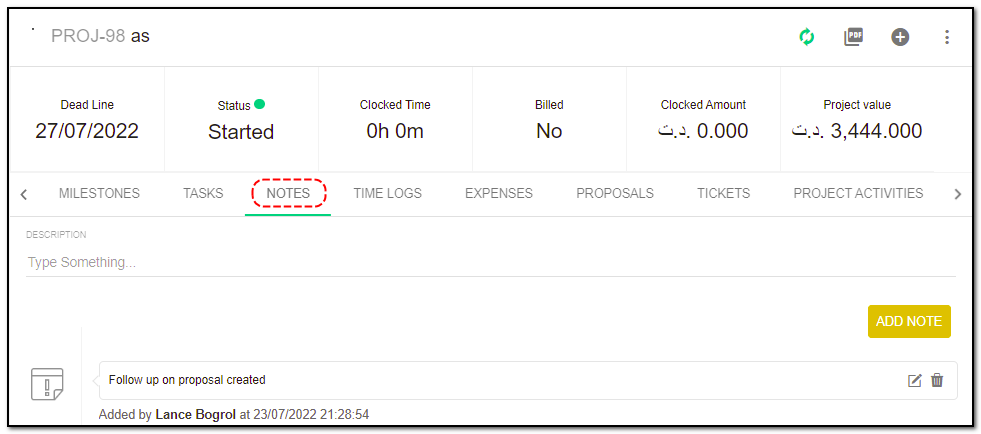
10. Notes Tab: Enter the Details or small short point in Description section related to project and click on "Add Note" button.
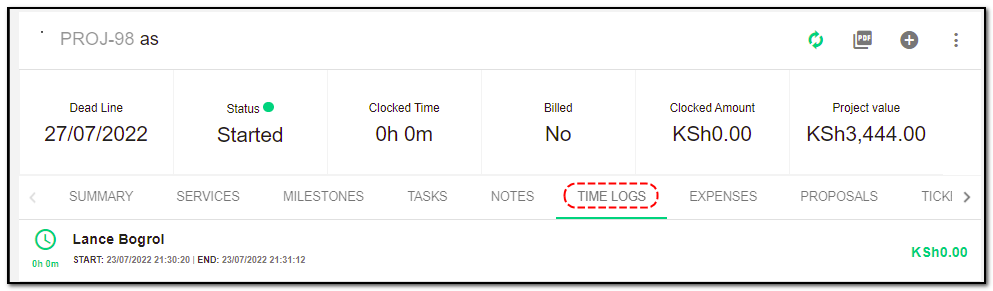
11. Timelogs Tab : You can check the time logs in the "Time Logs" subsection.
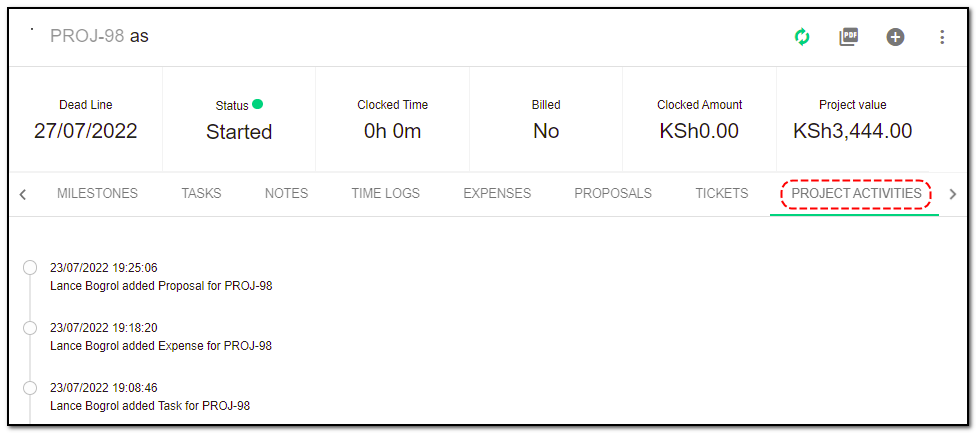
12. Project Activities: You can see all the project activities in the "Project Activities" subsection.
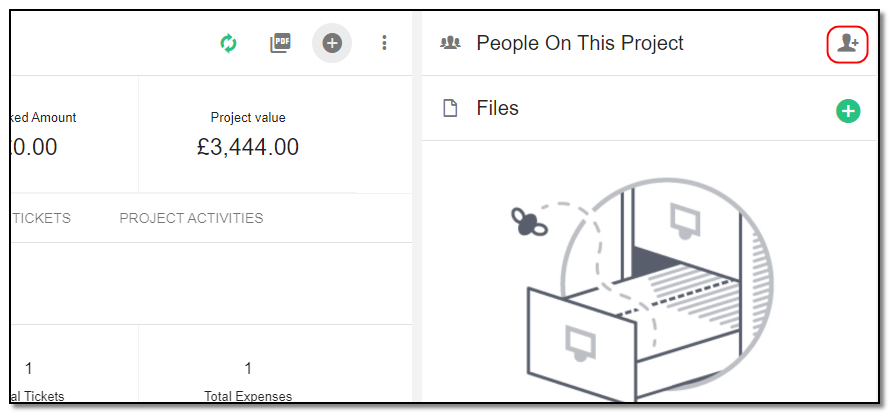
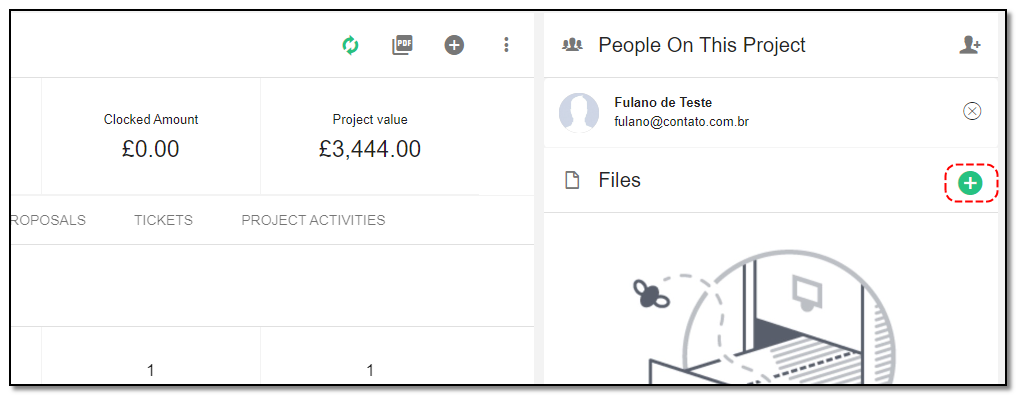
People on Project :
1. To add staff to your project click on "Add people" button on the right side panel .
2. A pop-up appears . Select the name whom you want to assign from the drop-down.
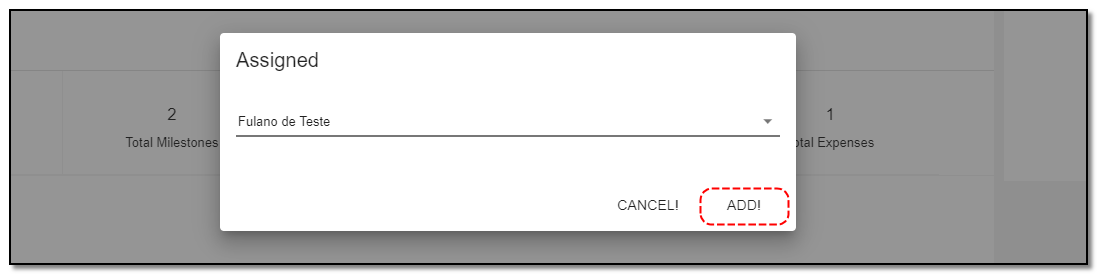
3. Click on "Add" and the staff is added to the project.
Attach File :
1. To add attachments to the project click on "+" button .
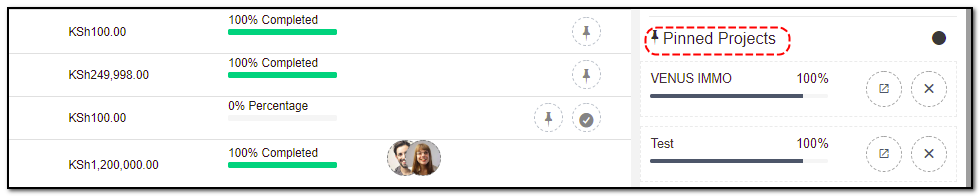
Pin project. :
1. You can pin the project from the main screen of project by clicking on the "pin" icon .
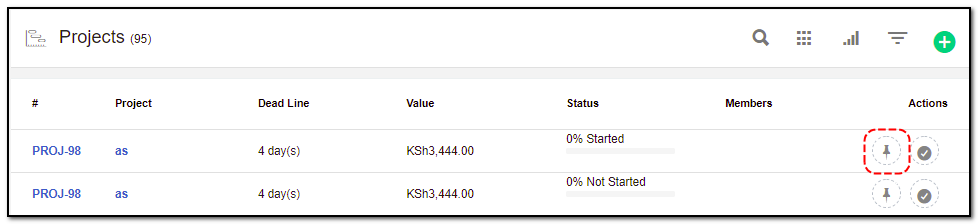
2. The pinned project will be displayed on the right panel of the screen .


Project Management ,Task Management , Ticketing
Manage you team task and project including timesheet
Written by Yaroslav M.